
How to Download and Set Up Git on Your PC
Git is a popular version control system that allows you to manage your code projects efficiently. Git also lets you collaborate with other developers on platforms like GitHub or GitLab. In this article, we will show you how to download and set up Git on your Windows PC.
Downloading Git
There are two main ways to download Git on your Windows PC: using the official installer or using the Winget command-line tool.
Using the Official Installer
To use the official installer, follow these steps:
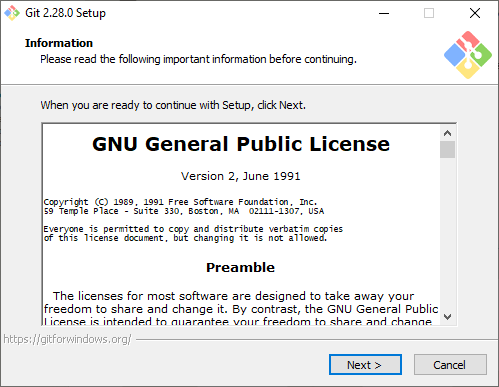
- Go to the Git website and click on the "64-bit Git for Windows Setup" link to start the download. The file size is about 50 MB, so it should not take long.
- Once downloaded, run the executable file as an administrator to start the installation. You will see a series of prompts that will guide you through the process.
- In the "Select Components" window, leave all the default options checked and select any additional components you want to install.
- In the "Choosing the default editor used by Git" window, select the text editor you want to use with Git. The default option is Vim, which is a powerful but complex editor. You may want to choose a more user-friendly editor, such as Visual Studio Code, Sublime, Notepad++, or any other plain text editor you prefer.
- In the "Adjusting your PATH environment" window, make sure that the "Git from the command line and also from 3rd-party software" option is selected. This will allow you to use Git from any terminal or application on your PC.
- Click through the remaining options and wait for the installation to finish. The total size of the installation will depend on what you chose to install, but it should be around 270 MB.
Using Winget
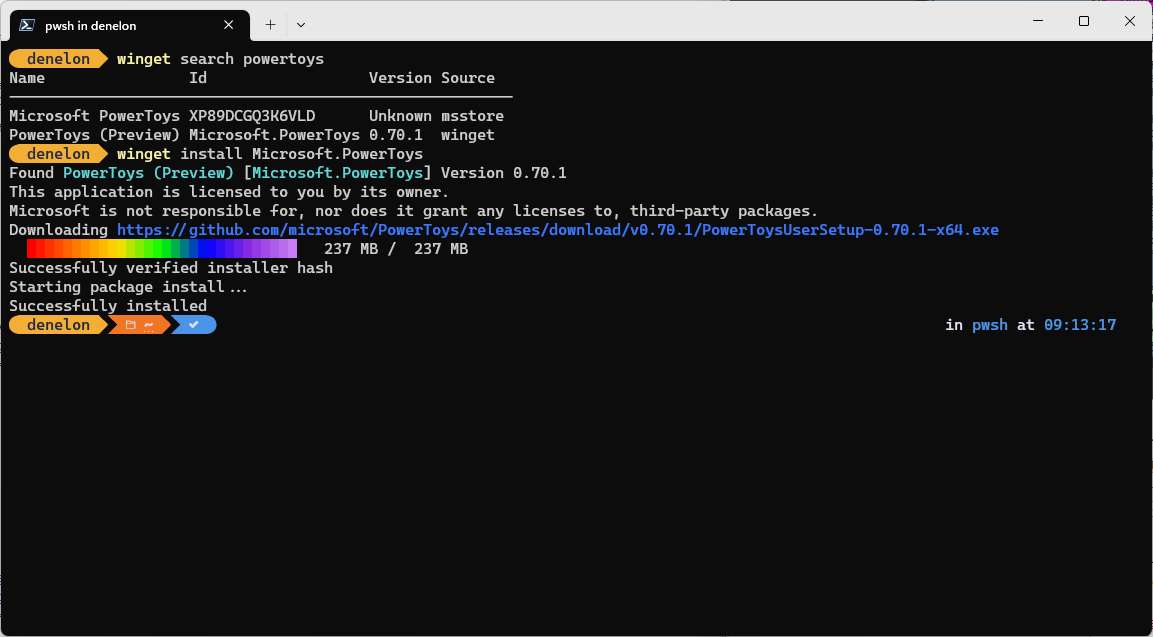
If you prefer to use a command-line tool to download and install Git, you can use Winget. Winget is a package manager that lets you install applications from a curated repository with a single command. To use Winget, follow these steps:
- Open PowerShell or Windows Terminal with a PowerShell tab and type or paste the following command: `winget install --id Git.Git -e --source winget`
- Press Enter and wait for Winget to fetch and install Git on your PC. You will see some progress bars and messages in the terminal window.
- A normal Windows installation window will appear as the final part of the installation process. You can close it when it finishes.
Setting Up Git
After installing Git on your PC, you need to do some basic configuration to customize your Git environment. You only need to do this once for each PC you use.
To set up Git, follow these steps:
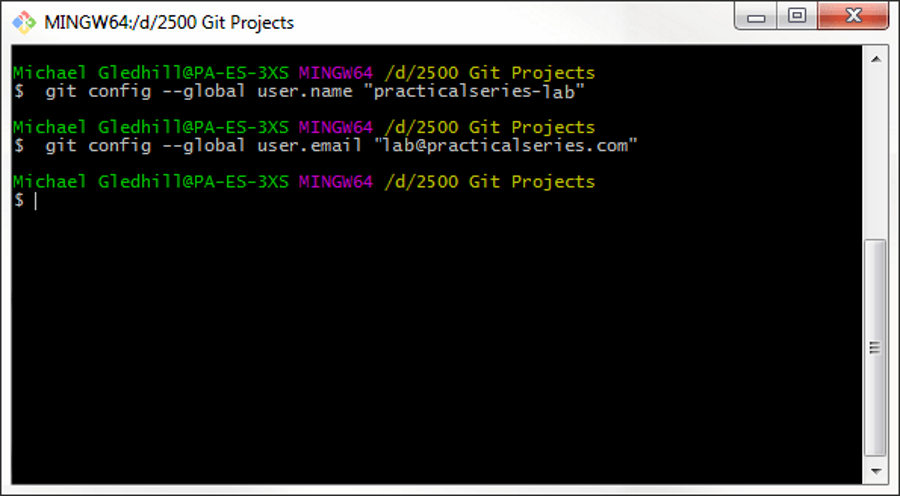
- Open a terminal window (such as PowerShell, Windows Terminal, or Command Prompt) and type or paste the following command: `git config --global user.name "Your Name"` Replace "Your Name" with your actual name or any name you want to use with Git.
- Press Enter and type or paste the following command: `git config --global user.email "[email protected]"` Replace "[email protected]" with your actual email address or any email address you want to use with Git.
- Press Enter and type or paste the following command: `git config --list --show-origin` This will show you all your Git settings and where they are stored.
Introduction to Git
Conclusion
In this article, we have shown you how to download and set up Git on your Windows PC using two different methods: using the official installer or using Winget. We have also shown you how to configure your Git environment with your name and email address.
Git is a powerful tool that can help you improve your coding workflow and collaborate with other developers. We hope this article has helped you get started with Git on your PC.